Thursday, January 26, 2012

Fraction Museum

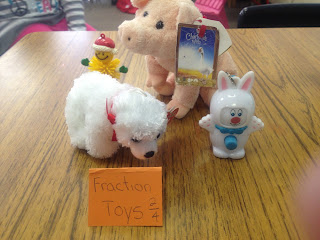
This was so cool!  My students were so excited!  The assignment: "Bring in something to represent a fraction."  The results were so creative and it allowed me to see exactly what they knew about fraction numerators and denominators.  Students had to present their "museum exhibit."  Some had others guess their fractions, and others told why they chose the fraction they did.  It was very successful!
Here are some of the examples:

2/4 or 1/2 Storm Troopers

1/4 are bandaids

2/4 or 1/2 were fuzzy.  Students also guessed 1/4 had a button!

This student went all out to give us a fraction and even a circle graph of the color amounts compared to the whole bag of M&M's

3/4 blue nail polish


Create a fraction museum in your classroom.  It is amazing what you'll get, and the kids really buy into it because they can bring items and "toys" from home to make their fractions!
Have a great week!


Sunday, January 22, 2012

Teaching Fractions

I'm getting ready to start a new unit tomorrow: Fractions. 

My kiddos get excited about having their very own manipulatives so I've made them fun fraction bars. 

It's really easy!

1. Find great paper from Hobby Lobby, or AC Moore or any local craft store:

2. Photo copy a fraction bar template on the back or the fun papers, and laminate.
3. Cut the fraction bars out.


4. Finally, put them in a baggie and give them to your students.


I let my students trade them.  The only rule I gave them is that they have to trade the same denominators.  Example: I'll give you 2/12 for 2/12.  This way they will always have a complete set.
Here is a set of fraction bars that you can copy and paste into a word document.  Once you have it in a word document you can re-size the picture to the size you would like it. 

Good Luck I hope your kids like them as much as mine do!!
P.S. I am adding one more resource!
I also cut out Fraction Pies for each of my students.  Then I hole punched each fraction circle and put them together with a piece of yarn.  I like the ones at this link (click on Fraction Pies) because it also showed the students the written form of each fraction, the percent, and the decimal.  Stay posted for some more ideas with fractions!

Monday, January 9, 2012

Multiplication Disks

I had to share these cool multiplication disks. 
My students needed to practice their multiplication facts so I told them I would make them flash cards.  However, to make flash cards for multiplication and division facts 1 through 12 for 17 children... well, that's a lot of paper.  So I found these disks and they took far less time, and are so much cooler.  My kiddo's loved them! You can even get your students in on the fun!


So here is how to make them:
SIDE ONE
1. Cut out a circle.
2. Put 12 holes around the edge - I used a cool star punch.
3. Put x ___ (the factor i.e. 1,2,3,4 etc...) in the middle.
4. Next to each hole write the numbers 1- 12 (I wrote mine random - because I wanted my students to practice them - you could also write them in order)

SIDE TWO
1. Write  ÷ __ (same factor as above)
2. Put your finger over the hole and figure out the problem from the other side. For example: If your factor in the middle is 6 and the hole you put your finger over is 7 (from the multiplication side) do 6 x 7.  This equals 42 so write 42 on the hole.  Do this for each number.  If you provided the circles your students could do this and check it on a multiplication chart.  The act of creating these could be it's own practice. 
Here is an example of step two from above: 6 x 10  

is equal to 60.  When I flip the disk over and look at the number where my finger was it shows 60
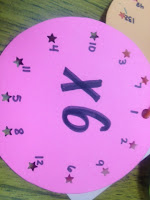


This is such a cool tool to use in the classroom.
Hope you find it helpful in your classroom!

Science Workshop Series #1: Elements of Workshop

I am currently reading the book "Science Workshop Reading, Writing and Thinking Like a Scientist" By Wendy Saul in hopes to pre...